Desktop Application
Download the SF Veritas Desktop Application for your platform.
Download
Installation Notes
macOS
- Open the
.dmgfile and drag SF Veritas to your Applications folder - First launch: Right-click the app and select "Open" (required for unsigned apps)
Since the app is not yet notarized with Apple, macOS will show a security warning ("SF Veritas is damaged and can't be opened") on first launch. Run the following command in Terminal to remove the quarantine attribute:
xattr -cr /Applications/SF\ Veritas.app
After running this command, the app will open normally.
Windows
- Run the installer (
.exe) and follow the prompts
Since the app is not yet code-signed, Windows SmartScreen may show a warning:
- Click "More info"
- Click "Run anyway"
This is a one-time step for each new version.
Linux
AppImage:
chmod +x SF-Veritas-*.AppImage
./SF-Veritas-*.AppImage
Debian/Ubuntu (.deb):
sudo dpkg -i sf-veritas_*.deb
No special permissions or workarounds needed on Linux.
The Desktop Application automatically checks for updates on startup. When a new version is available, you'll be prompted to download and install it.
Migrating from VS Code Extension
If you've been using the SF Veritas VS Code extension and want to switch to the Desktop App, here's what you need to know:
Automatic Handling
The Desktop App automatically detects and stops any existing SF Veritas service running on port 6776 (including the VS Code extension's service). When this happens, you'll see a notification that the conflict was resolved.
What Happens to Your Data
- Your telemetry data is preserved - Both the extension and Desktop App use the same SQLite database at
~/.sailfish/telemetry.db - Your settings are separate - The Desktop App has its own settings, independent of VS Code extension settings
Recommended Steps
-
Disable the VS Code extension's auto-start (optional but recommended):
- Open VS Code Settings (
Cmd+,/Ctrl+,) - Search for
sfVeritas.autoStartServer - Uncheck the setting
- Open VS Code Settings (
-
Launch the Desktop App - It will automatically handle any port conflicts
-
Keep your code integration - Your existing
setupInterceptors()calls will work with either the extension or Desktop App since they both use port 6776
Running Both (Not Recommended)
You cannot run both the VS Code extension and Desktop App simultaneously since they use the same port. Choose one:
- Desktop App: Better for standalone use, auto-updates, cross-IDE support
- VS Code Extension: Better if you prefer everything in VS Code
If the Desktop App cannot automatically stop a conflicting process, you'll see an error message. In this case, manually close VS Code or run: lsof -i :6776 to find and stop the conflicting process.
Setup Wizard
When you first launch SF Veritas, the Setup Wizard will guide you through configuring Sailfish instrumentation for your applications. This automates the code integration process using your preferred AI coding assistant.
Step 1: Welcome
The wizard scans your machine for Git repositories and running processes that can be instrumented with Sailfish.
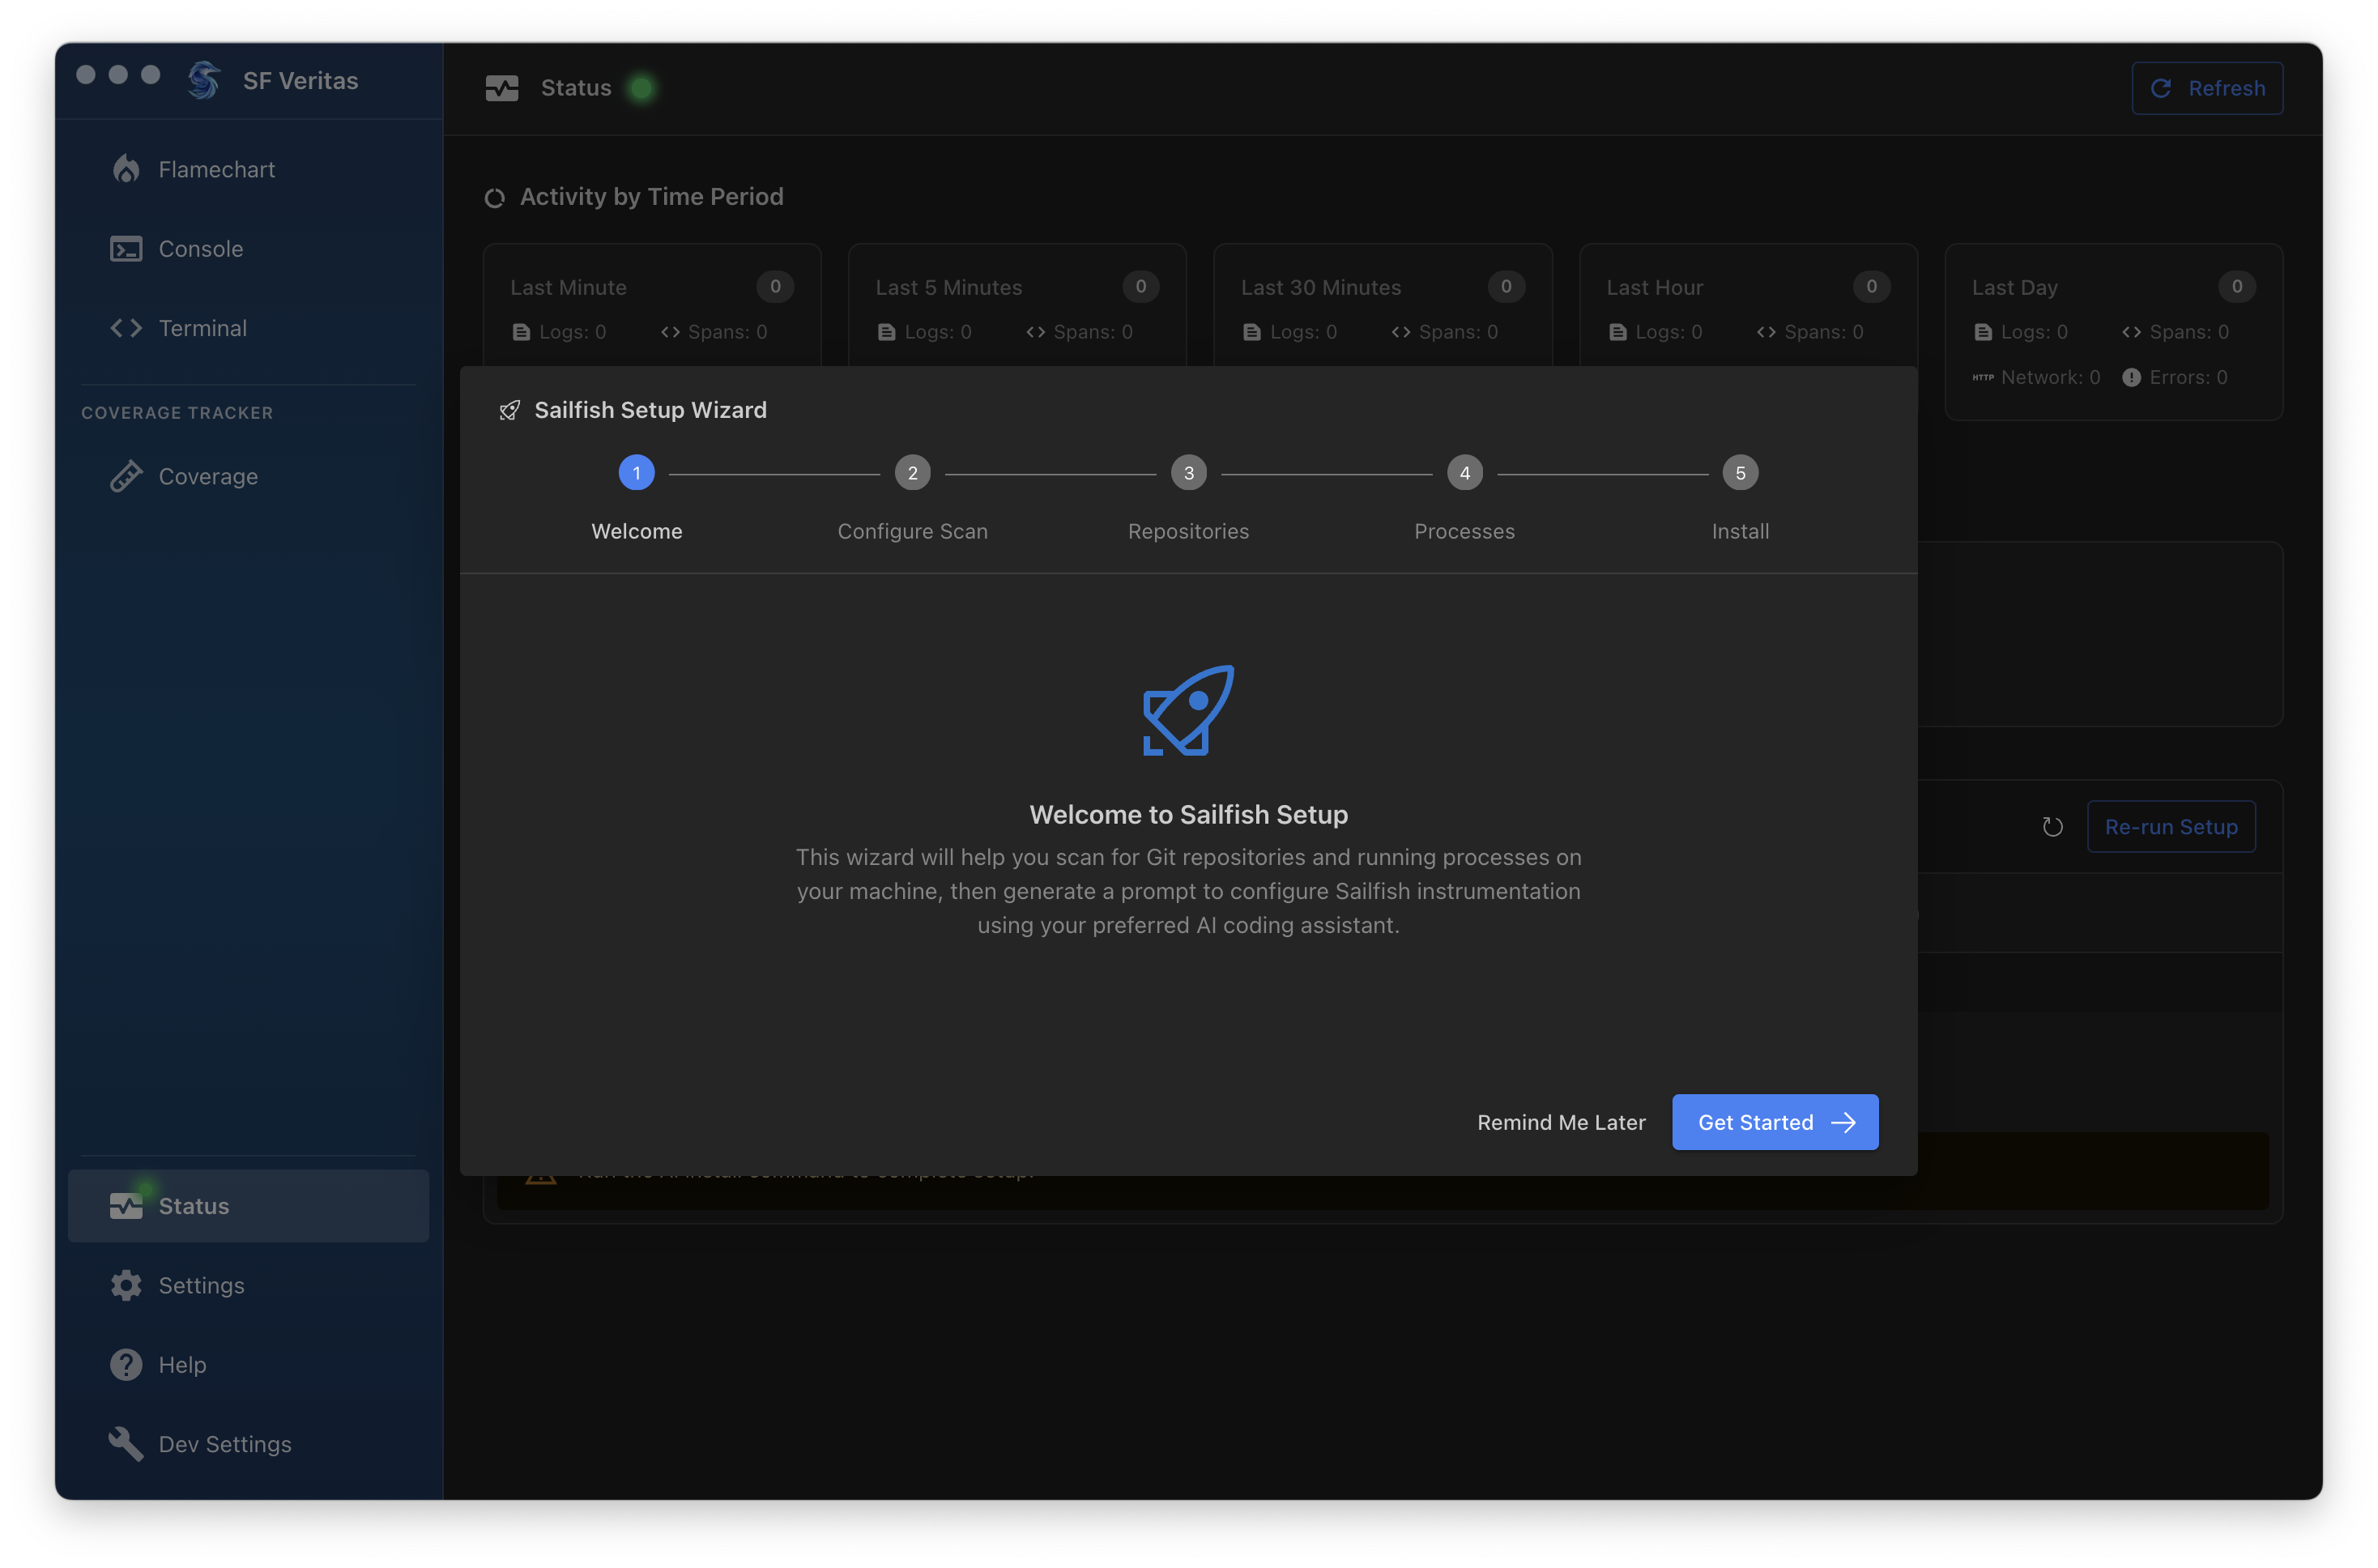
Click "Get Started" to begin the configuration process. The wizard will:
- Configure Scan - Set scan parameters for finding your projects
- Repositories - Discover Git repositories on your machine
- Processes - Detect running applications that can be instrumented
- Install - Generate and run the instrumentation commands
Step 2: Install with AI Assistant
After scanning, select your preferred AI coding assistant to run the installation. The wizard generates a prompt with all the necessary configuration for your detected projects.
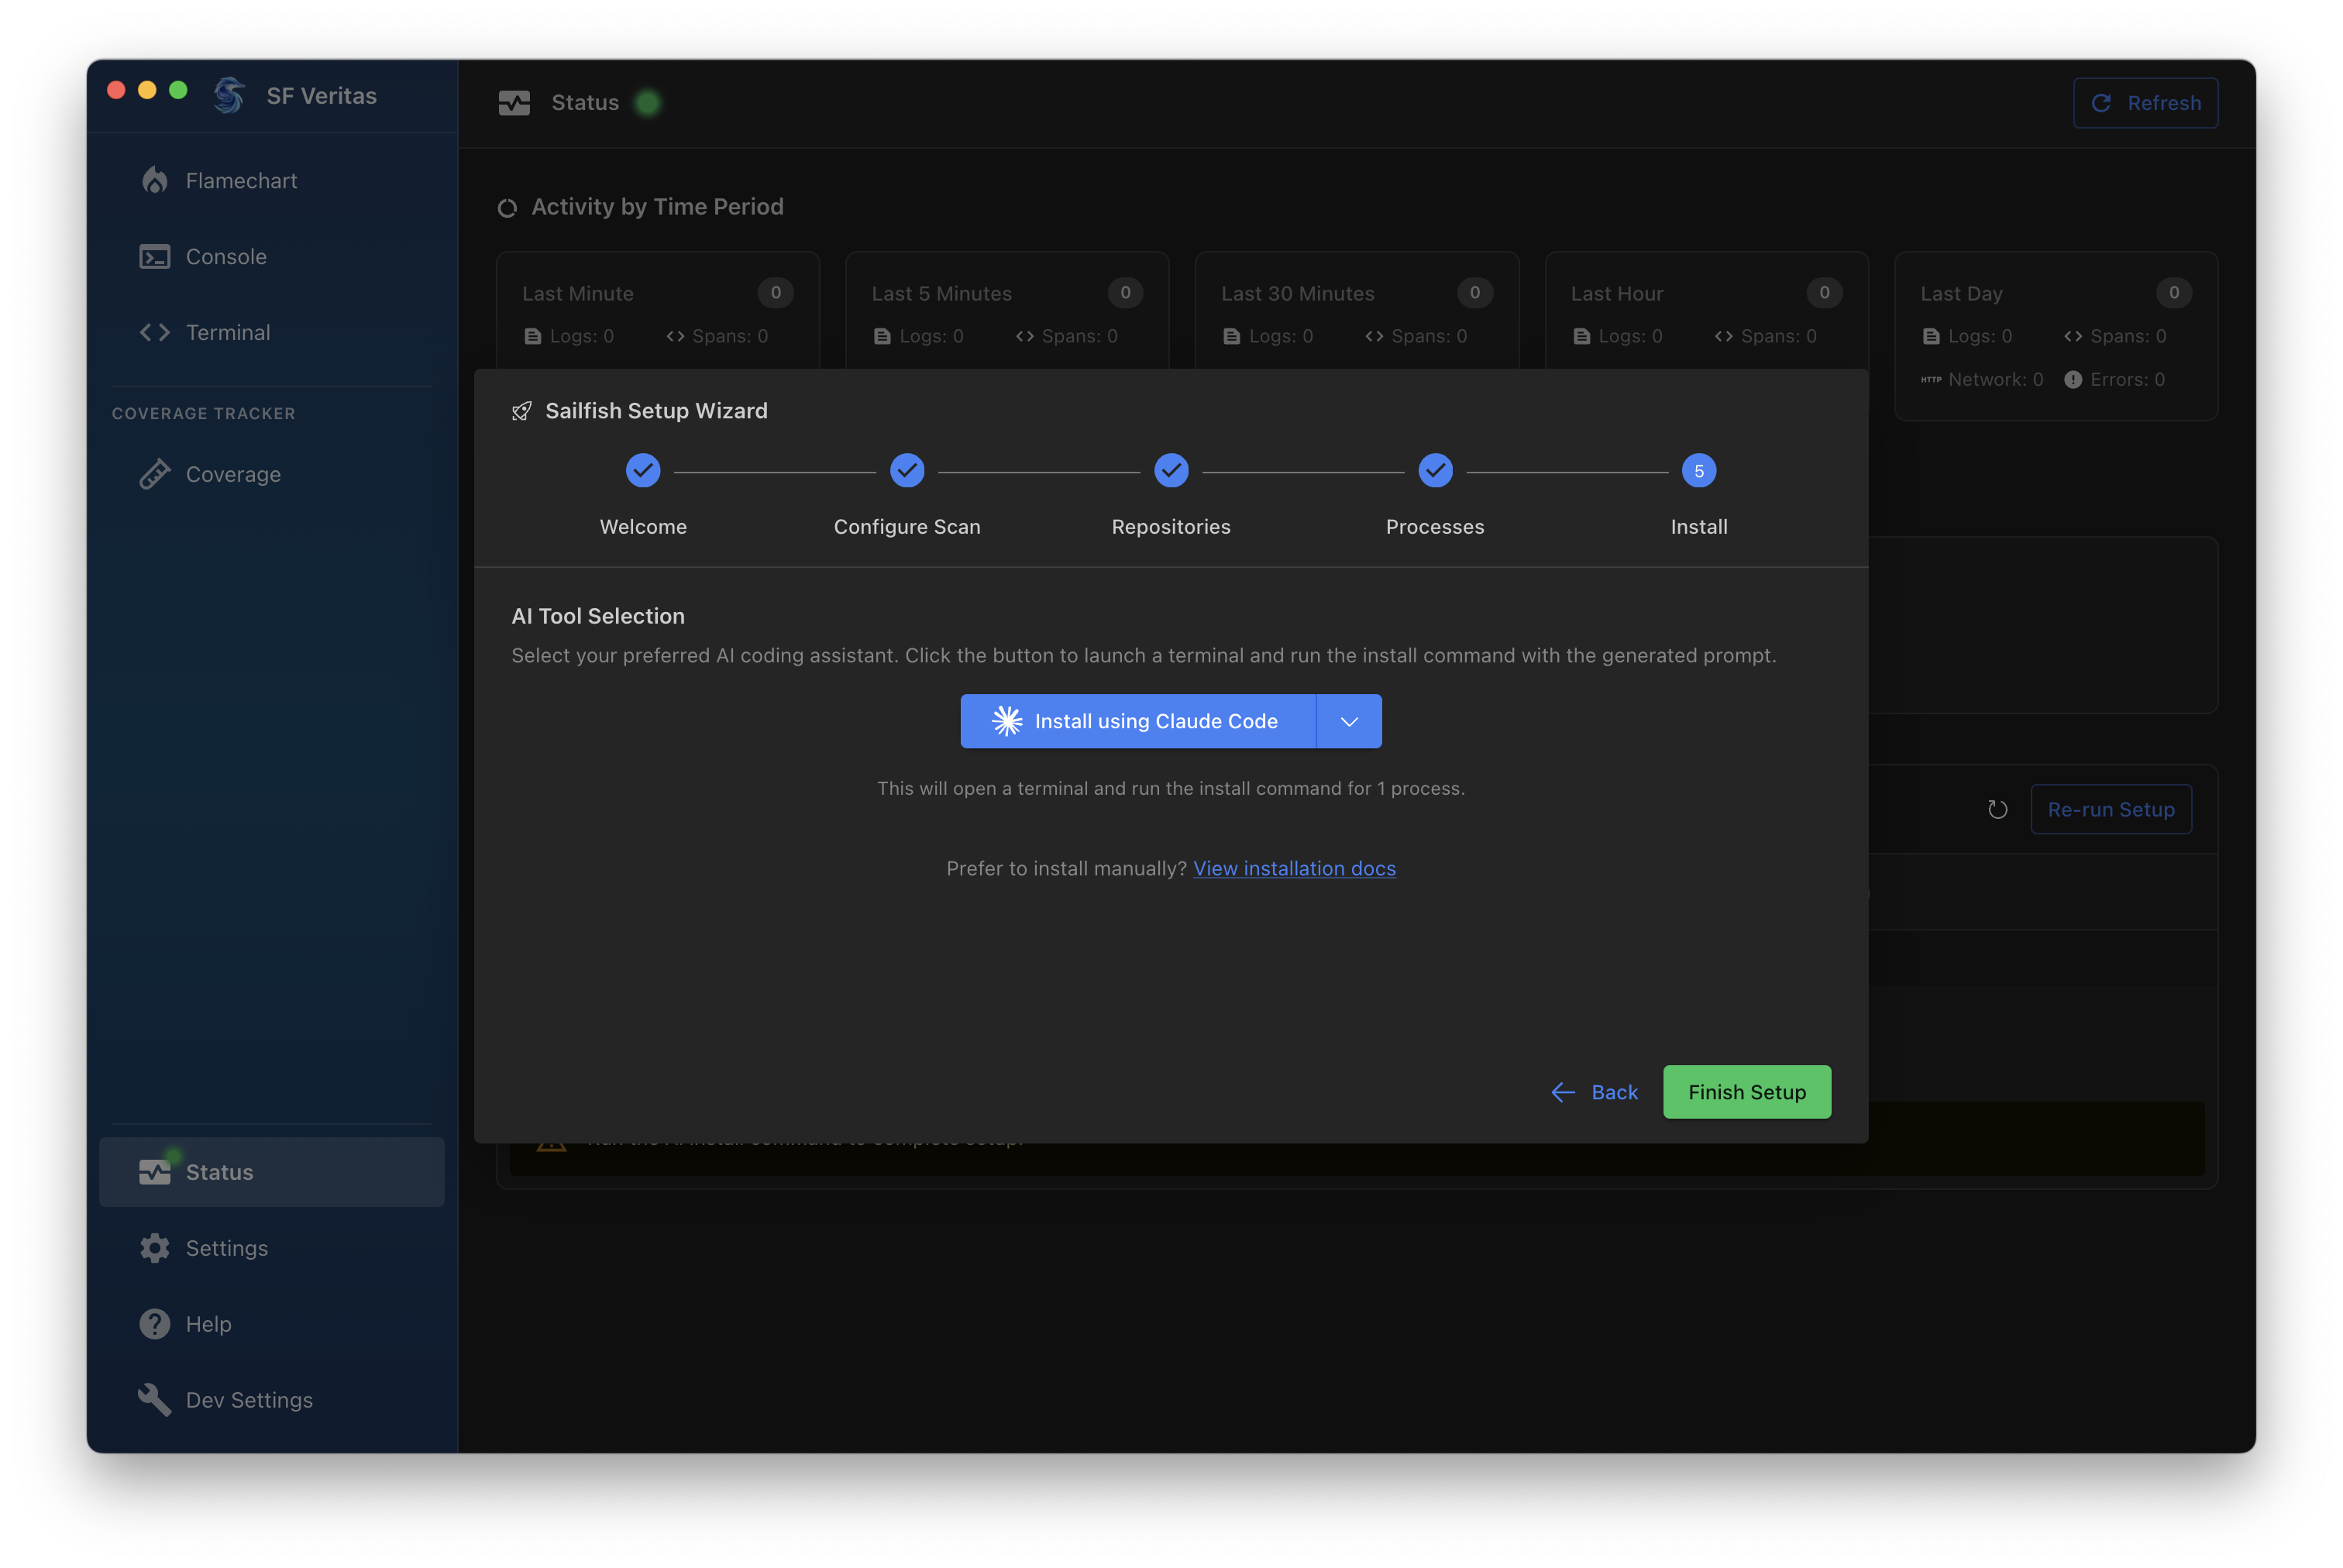
Click "Install using Claude Code" (or select another AI tool from the dropdown) to:
- Open a terminal window
- Run the generated installation command
- Automatically configure Sailfish instrumentation in your codebase
Prefer to install manually? See Integrate with Your Code for step-by-step instructions.
Re-running Setup
You can re-run the Setup Wizard at any time from the Status page. This is useful when you:
- Add new repositories to your machine
- Start new applications you want to instrument
- Need to reconfigure existing instrumentation
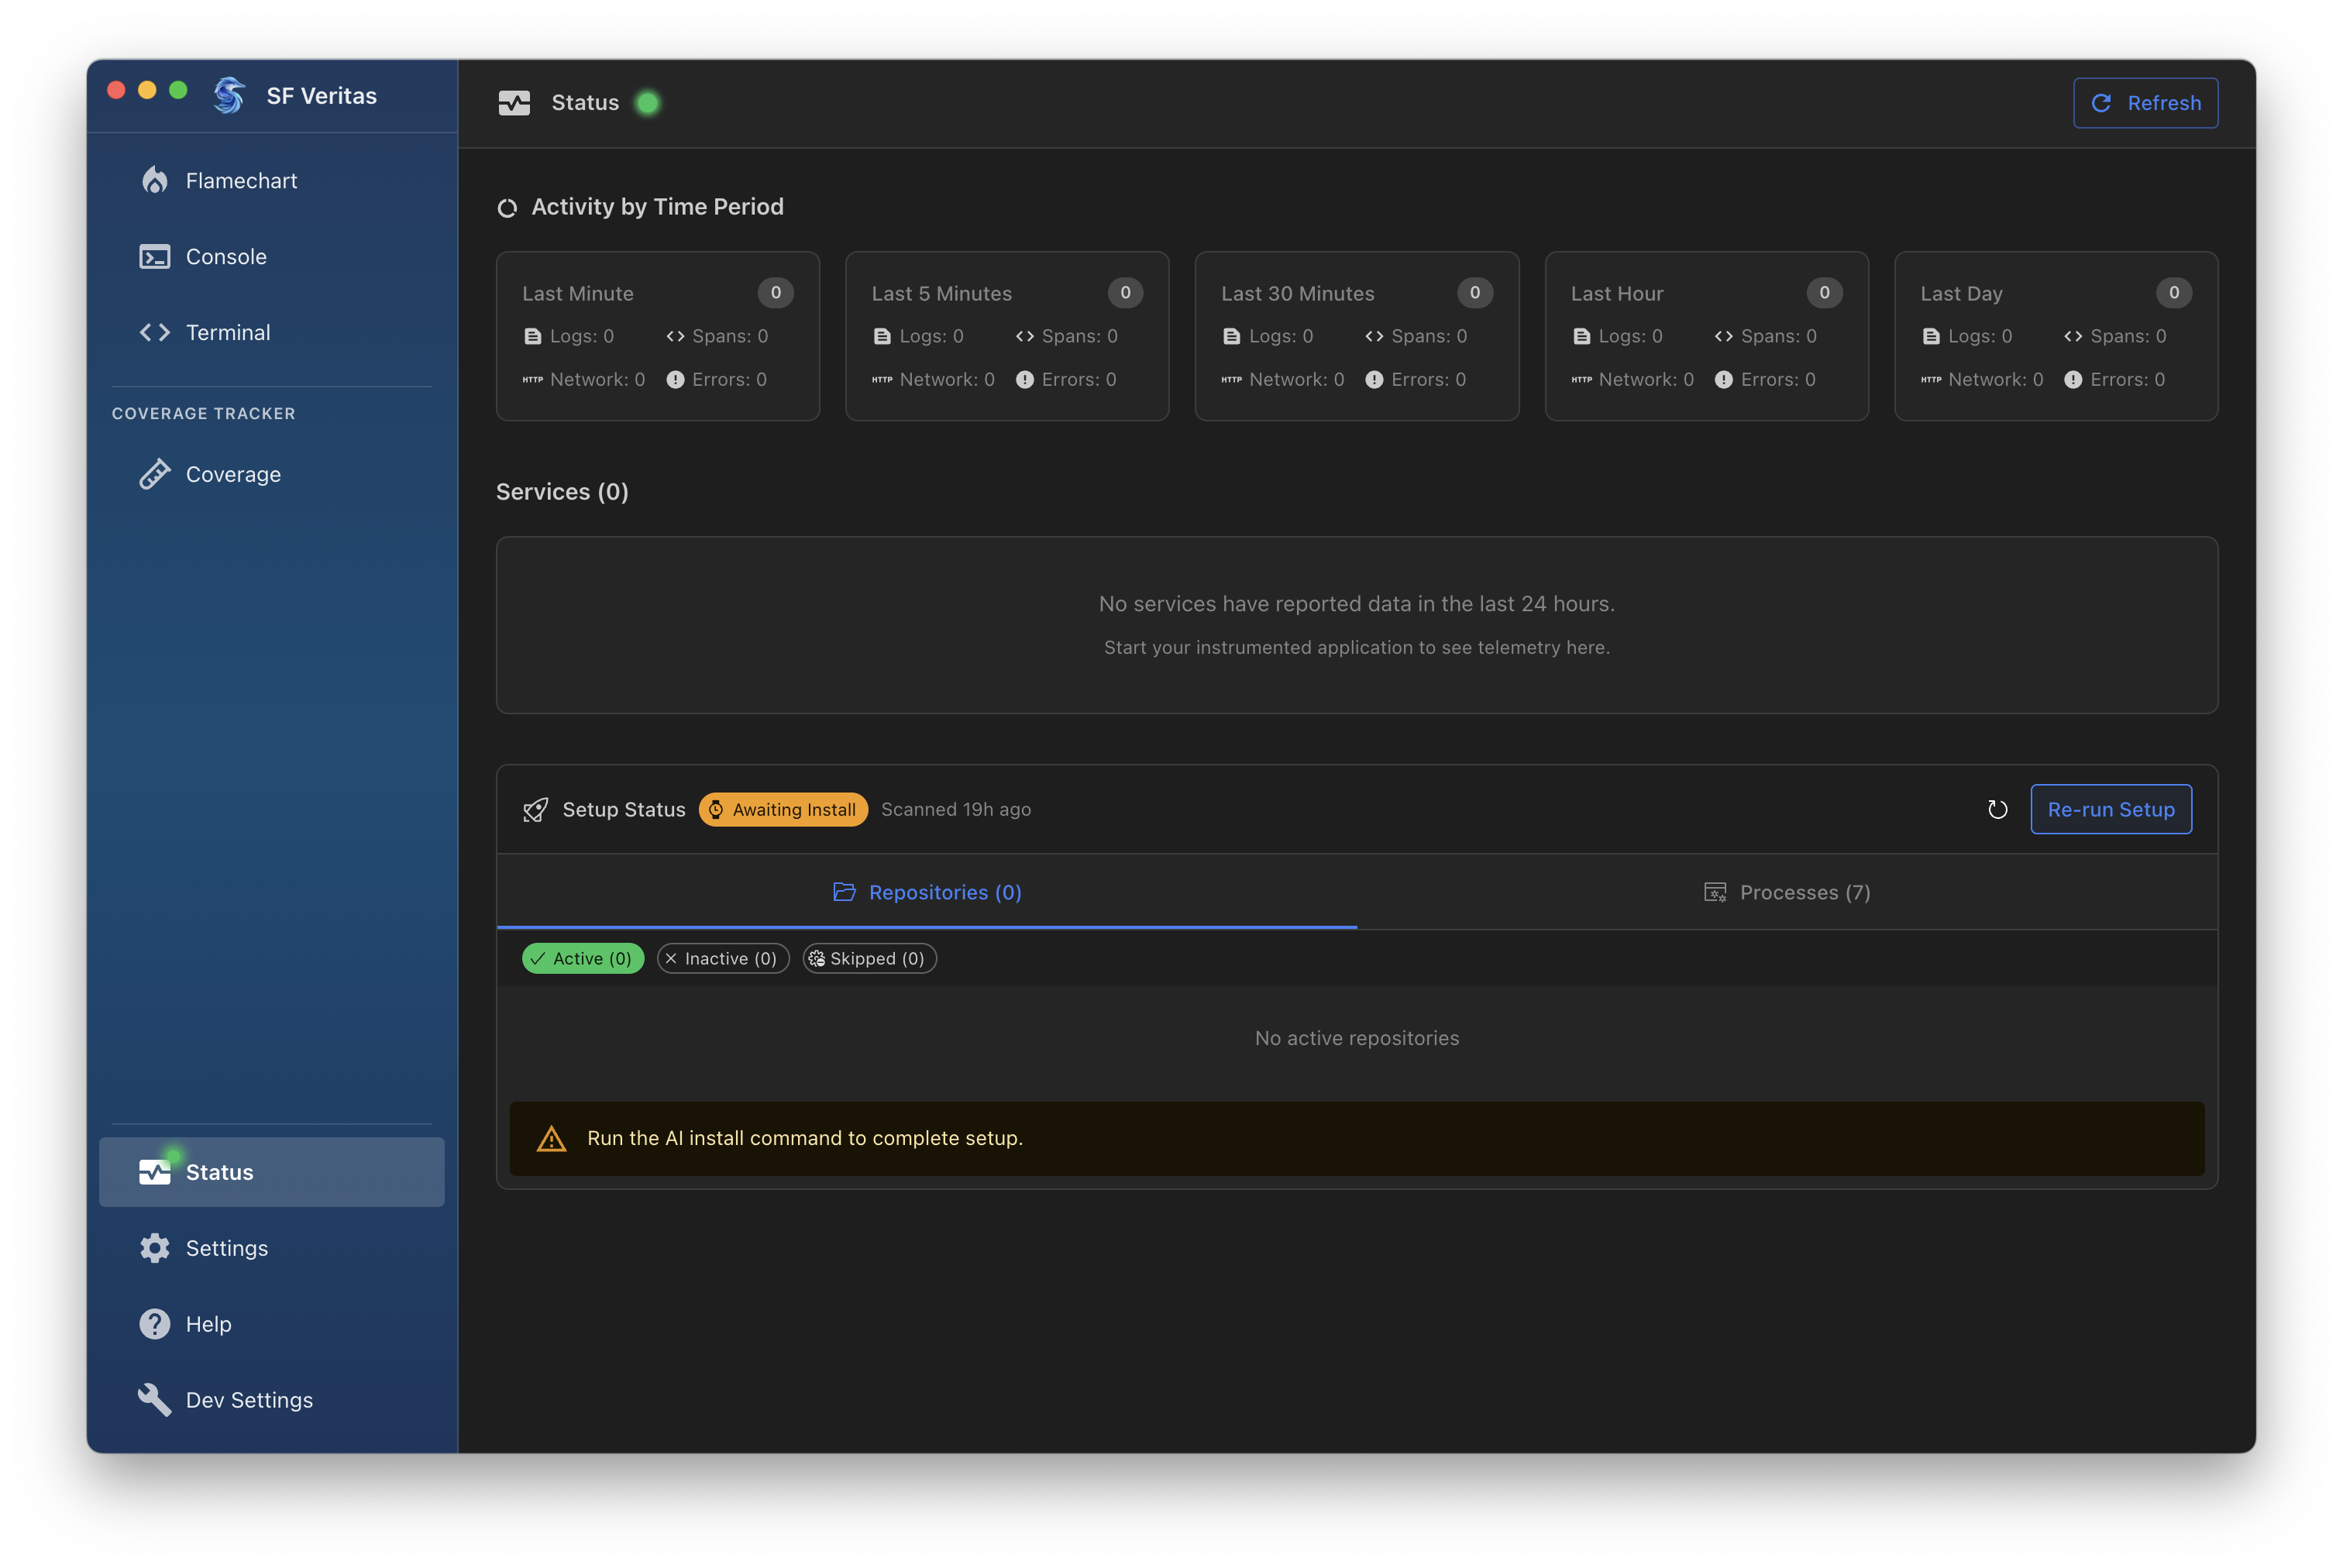
On the Status page, find the Setup Status section and click "Re-run Setup" to launch the wizard again.
Next Steps
- Integrate with Your Code - Set up your backend and frontend
- How to Use - Learn to use the Console and Flamechart